Think of your Kindlybook page as your digital receptionist. It welcomes clients, shows them what you offer, and even collects payments. But here’s the catch: if it’s not set up the right way, it won’t do any of those things well.
Don’t worry, fixing this doesn’t take a ton of effort. In this article, I’ll show you 6 simple ways to get the best out of your Kindlybook page so it actually saves you time and helps you get more bookings.
1. Use your real business name
When you sign up on Kindlybook, you will be required to enter your business name. Don’t just type something random like “Hair Services” or “Coaching Business”.
Remember that by the time clients land on your booking page, they’ve already come across you somewhere (maybe through Instagram, WhatsApp, or a referral). The name they see here should immediately confirm they’re in the right place.
Using your real business name (or your name if you’re a personal brand) makes you look professional, intentional, and trustworthy.
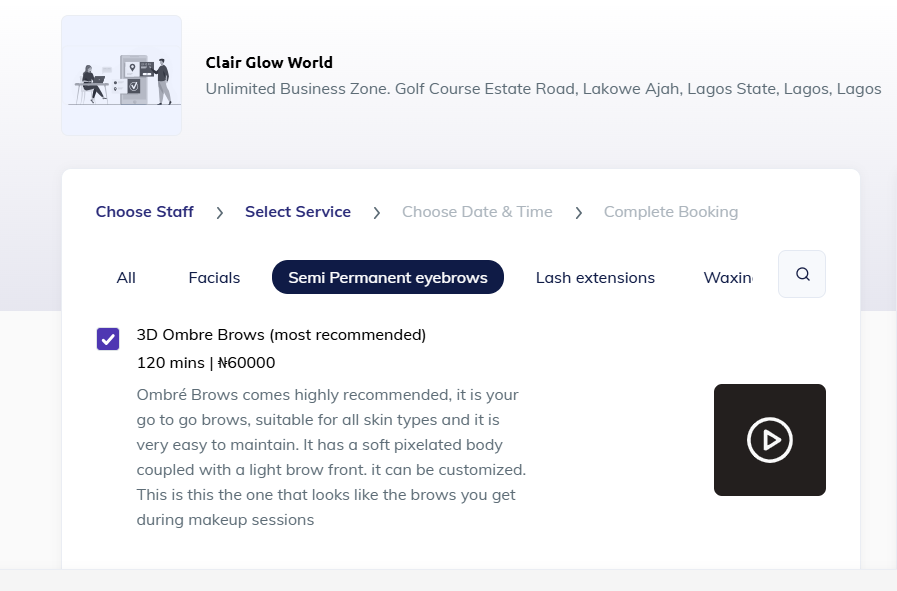
2. Add all your services and prices
When people land on your Kindlybook page, they want to see answers to their questions: What can I book? How much does it cost?
Leaving your page blank is like running a salon with no price list, and you don’t want to have that.
To get the best out of your booking page, list out every service you offer, add their prices, and keep them updated. If you have multiple services, you can group them into categories so clients can easily find what they need.
3. Add service descriptions
Go a step further by adding short descriptions to each service. This helps clients understand what they’re getting and whether it’s the right fit for them, making it much easier for them to book your service with confidence.
You can add a written description, an image or a video that accurately describes the service and what a potential client should expect.
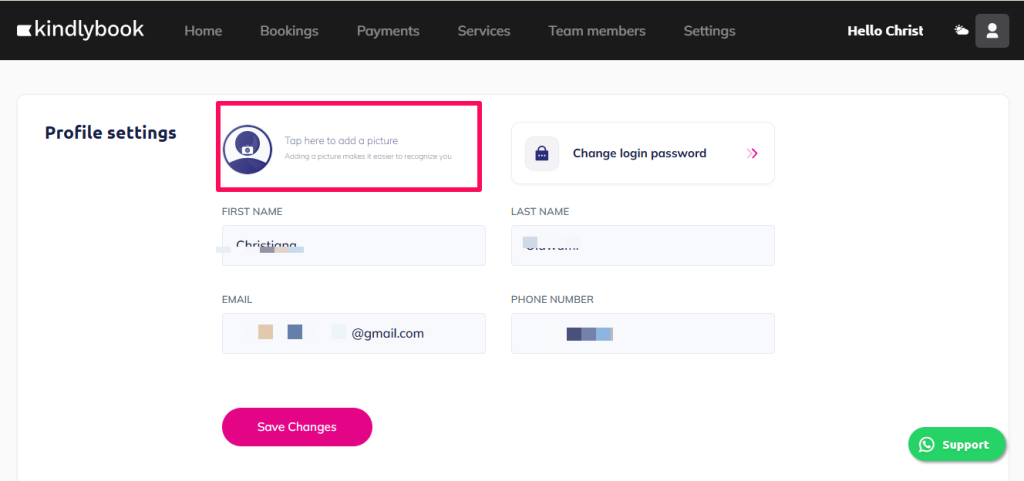
4. Add your logo/headshot image
Your Kindlybook page works best when it feels personal and professional. A clear logo or headshot image, if it’s a personal brand, gives your page instant credibility. Clients are more likely to book when they can see who they are dealing with or recognize your brand.
If you already have a business logo, upload it so your page matches the rest of your branding. If you’re a solo service provider, you can use a professional headshot instead.
5. Submit your payout information
One of the most important steps when creating your Kindlybook page is adding your payout information. This is how you actually receive the money from bookings made on your page.
If you skip this step, payments from clients will just sit pending, which means no cash in your account until you fix it. By adding your payout details right away, every payment goes directly into your account, giving you a smooth and professional process from start to finish.
6. Promote your booking page
If clients don’t know your booking page exists, they can’t use it. Don’t just create your Kindlybook page and wait. Share it everywhere.
Add your booking link to your Instagram bio, WhatsApp auto-responder, Facebook page, LinkedIn, and even your email signature.
When clients DM or call you to ask for availability, send them your Kindlybook link instead. You can also share testimonials or before-and-after results on social media, paired with your link, so people see the results and know exactly how to book you.
The more visible your booking page is, the more natural it becomes for clients to book through it.
Conclusion
When you treat your Kindlybook page like a digital receptionist, welcoming clients, showing off your services, and handling payments, you create a smooth experience that builds trust and gets you more bookings.
Every small detail you add today will save you time tomorrow and bring in steady income. So don’t just set up your page halfway and hope for the best, polish it, promote it, and let it do the heavy lifting for your business.
Are you ready to create a booking page that truly works for you? Get your free booking page here.